The 100th day of school is a milestone worth celebrating! And what better way to commemorate this achievement than with a creative and personalized 100th-day of school shirt adorned with 100 items? This article will guide you through ideas and inspiration for creating a memorable shirt that your child will love.
This momentous occasion marks a significant point in the academic year, signaling growth, learning, and a whole lot of fun. A 100th day of school shirt allows kids to showcase their creativity and celebrate their accomplishments in a tangible and exciting way. Let’s dive into how you can make this project a smashing success.
Why Make a 100th Day of School Shirt?
Creating a 100th day of school shirt is more than just a fun craft project; it’s a way to:
- Celebrate Achievement: Acknowledge the hard work and progress made during the first 100 days of school.
- Foster Creativity: Encourage kids to express their individuality through design and item selection.
- Enhance Learning: Incorporate math skills by counting and arranging 100 items.
- Create Memories: Build a keepsake that commemorates a special milestone in their education.
The 100th day of school is often a focal point in the school year, with various activities planned around it. Participating with a themed shirt adds to the excitement and provides a unique opportunity for children to stand out and share their accomplishment with their peers.
Brainstorming Ideas for Your 100th Day of School Shirt
The possibilities for a 100th-day of school shirt are endless! Here are some ideas to get your creative juices flowing:
- Collections: Use a collection of small items, such as buttons, beads, stickers, or pom-poms.
- Themes: Choose a theme that resonates with your child’s interests, such as animals, sports, or superheroes.
- Educational: Incorporate educational elements, such as 100 sight words or math problems.
- DIY Approach: For a more unique look, consider 100 days of school shirt ideas girl diy.
Think about what your child enjoys and how you can incorporate that into the design. Involve them in the brainstorming process to make it even more special. Don’t be afraid to get messy and have fun with it!
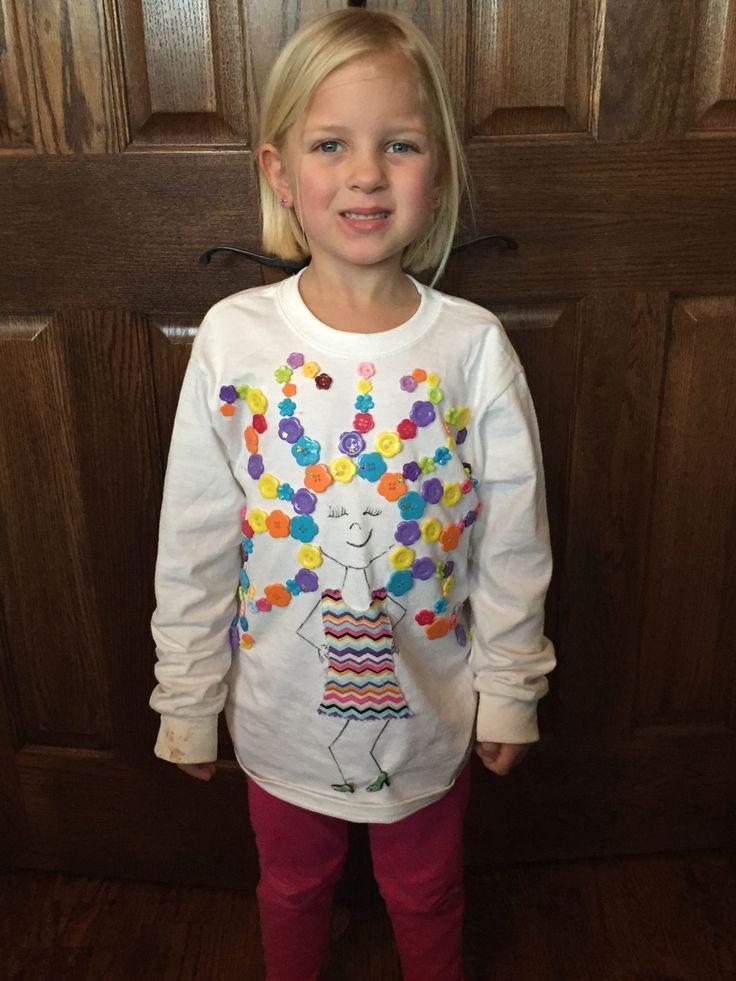 One Hundred Day of School Shirt with Buttons
Choosing Your 100 Items
Selecting the right 100 items is a crucial step in creating your perfect shirt. Here are a few considerations:
- Size: Choose items that are small enough to fit comfortably on the shirt without making it too bulky.
- Weight: Opt for lightweight items to avoid weighing down the shirt.
- Durability: Select items that will stay securely attached to the shirt and withstand wear and tear.
- Safety: Ensure that the items are safe for children to handle and wear. Avoid small parts that could be a choking hazard for younger children.
- Availability: For a full list, check 100 items for 100 days of school shirt.
Consider items that reflect your child’s personality or interests. This will make the shirt even more meaningful and personalized.
“The key to a successful 100th-day of school shirt is creativity and personalization,” says Lisa Miller, a seasoned elementary school teacher. “Involving the child in the design process not only makes it more enjoyable but also reinforces the learning experience.”
Materials You’ll Need
Before you start creating your shirt, gather the necessary materials:
- Plain T-shirt: Choose a comfortable, plain t-shirt in your child’s size. White or light-colored shirts work best as they provide a good background for the items.
- 100 Items: Select your chosen items.
- Fabric Glue or Hot Glue Gun: Use fabric glue for a more permanent hold or a hot glue gun for faster adhesion (adult supervision required).
- Scissors: For cutting fabric or trimming items, if needed.
- Pencil or Fabric Marker: For sketching your design on the shirt.
- Ruler: For measuring and ensuring even spacing.
- Cardboard or Thick Paper: To insert inside the shirt to prevent glue from seeping through to the back.
Make sure you have all your materials ready before you begin to streamline the process. A well-prepared workspace will make the project much easier and more enjoyable.
Step-by-Step Guide to Creating Your Shirt
Follow these steps to create a fantastic 100th-day of school shirt:
- Plan Your Design: Sketch out your design on paper or directly on the shirt using a pencil or fabric marker. Consider the placement of the 100 items.
- Prepare the Shirt: Insert a piece of cardboard or thick paper inside the shirt to prevent glue from seeping through.
- Attach the Items: Carefully glue each item onto the shirt according to your design. Use fabric glue or a hot glue gun (with adult supervision).
- Let It Dry: Allow the glue to dry completely before wearing the shirt. This may take several hours or overnight.
- Reinforce if Needed: Check the items after they are dry and reinforce any that seem loose.
Remember to have fun and be creative! There’s no right or wrong way to design your 100th-day of school shirt.
Creative Design Ideas and Layouts
Consider these design layouts when attaching the 100 items to the shirt:
- Rows and Columns: Arrange the items in neat rows and columns for a clean, organized look.
- Circular Design: Create a circular pattern with the items radiating out from the center of the shirt.
- Number 100: Arrange the items to form the number 100 on the shirt.
- Random Placement: For a more abstract and playful look, scatter the items randomly across the shirt.
Feel free to combine these ideas or come up with your unique layout! The most important thing is to create a design that you and your child love.
“Don’t be afraid to experiment with different layouts and designs,” advises David Chen, a creative art teacher. “The best 100th-day of school shirts are those that reflect the child’s personality and creativity.”
 One Hundred Day of School Shirt with Pom Poms
Adding a Personal Touch
To make the shirt even more special, consider adding a personal touch:
- Fabric Paint: Use fabric paint to add your child’s name, the date of the 100th day, or other decorative elements.
- Iron-On Transfers: Create custom iron-on transfers with photos or designs.
- Embroidery: Add embroidered details for a more sophisticated look.
These personal touches will make the shirt a cherished keepsake that your child will treasure for years to come.
Caring for Your 100th Day of School Shirt
To ensure your 100th-day of school shirt lasts, follow these care instructions:
- Hand Wash: Hand wash the shirt in cold water with a mild detergent.
- Air Dry: Avoid putting the shirt in the dryer, as this can damage the items and the glue.
- Ironing: If ironing is necessary, iron the shirt inside out on a low setting.
By following these care instructions, you can keep your 100th-day of school shirt looking great for years to come.
Making it Educational
Incorporate educational elements into your 100th day shirt:
- Sight Words: Use 100 sight words, writing each one on a small piece of paper or fabric and attaching it to the shirt.
- Math Problems: Include 100 simple math problems, such as addition or subtraction equations.
- Historical Facts: Feature 100 historical facts or trivia questions.
Turning the shirt into an educational tool adds another layer of learning and makes the project even more meaningful.
Conclusion
Creating a 100th Day Of School Shirt With 100 Items is a fantastic way to celebrate this special milestone. By involving your child in the process, you can foster creativity, enhance learning, and create lasting memories. So gather your materials, brainstorm some ideas, and get ready to create a shirt that your child will be proud to wear on their big day! This project is not only fun but also a wonderful opportunity to celebrate achievement and create a tangible reminder of their hard work and dedication during the first 100 days of school.
FAQ: 100th Day of School Shirt
Q: What if I don’t have 100 of the same item?
A: You can mix and match different items as long as you have a total of 100. This adds variety and visual interest to the shirt.
Q: Is it better to use fabric glue or a hot glue gun?
A: Fabric glue provides a more permanent hold and is generally safer for children to use. A hot glue gun provides faster adhesion but requires adult supervision.
Q: Can I use glitter on the shirt?
A: Yes, you can use glitter! However, be aware that glitter can be messy. Consider using glitter glue or sealing the glitter with a clear sealant to prevent it from shedding.
Q: How can I make the shirt more durable?
A: Choose high-quality fabric glue or use a hot glue gun with careful application. Reinforce any items that seem loose after the glue has dried.
Q: What if my child doesn’t want to wear the shirt after the 100th day?
A: You can turn the shirt into a keepsake by framing it or displaying it as a piece of art. It can also be stored in a memory box as a reminder of this special milestone.