The 4th of July is just around the corner, and what better way to celebrate than with a festive, homemade shirt? Ditch the store-bought options and unleash your creativity with these Easy Diy 4th Of July Shirts ideas. From simple stencils to dazzling tie-dye, there’s a project here for everyone. Get ready to show off your patriotic pride in style!
Making your own 4th of July shirt allows for a unique, personalized touch that store-bought options simply can’t match. Plus, it’s a fun activity to do with friends and family! This guide will cover several easy and fun DIY projects to make unique shirts. And if you’re looking for something ready-made, check out our selection of columbia 4th of july shirts.
Simple Stencil Designs
Stencils are a fantastic way to create clean, professional-looking designs on your 4th of July shirts. Here’s how to get started:
- Choose Your Stencil: You can buy pre-made stencils online or at craft stores. Alternatively, create your own using freezer paper and a craft knife. Classic choices include stars, stripes, flags, and the Liberty Bell.
- Prepare Your Shirt: Wash and iron your shirt to ensure a smooth surface. Place a piece of cardboard inside to prevent the paint from bleeding through.
- Position the Stencil: Carefully position your stencil on the shirt and secure it with painter’s tape.
- Apply the Paint: Use a stencil brush or sponge to dab acrylic fabric paint onto the stencil. Apply thin layers to prevent bleeding.
- Remove the Stencil: Gently peel off the stencil while the paint is still slightly wet.
- Let it Dry: Allow the paint to dry completely before wearing or washing your shirt.
“Stenciling is a great option because it’s super versatile! You can use one big stencil or a bunch of small ones to create something totally unique,” explains Sarah Miller, a DIY fashion blogger.
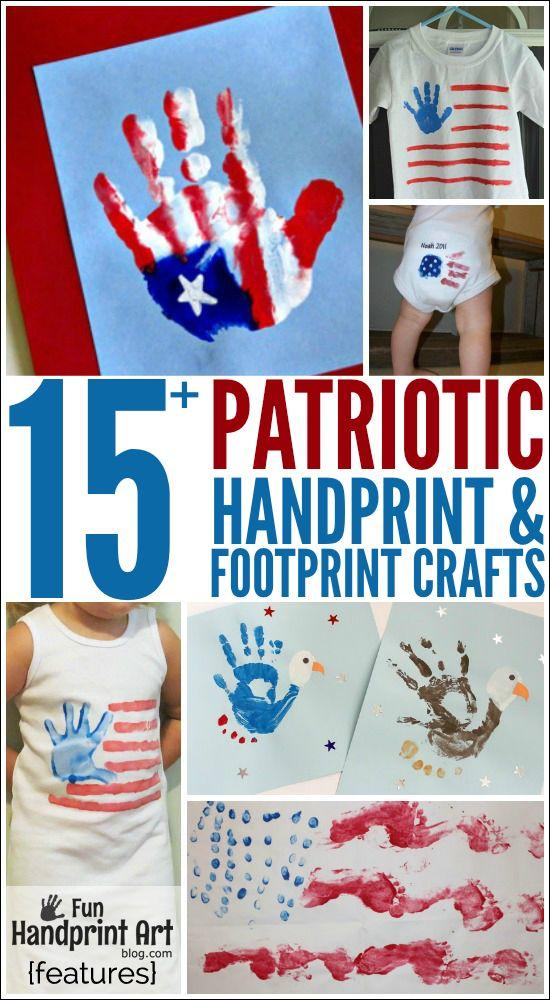 Patriotic Star Stencil Shirt
If you’re looking for a cute graphic shirt without the hassle, perhaps a hello kitty 4th of july shirt is for you.
Tie-Dye Patriotic Patterns
Tie-dye is a fun and vibrant way to celebrate the 4th of July. Here’s how to create a patriotic tie-dye design:
- Gather Your Supplies: You’ll need a white cotton shirt, rubber bands, red and blue dye, a squeeze bottle, and gloves.
- Prepare Your Shirt: Wash and dry your shirt.
- Twist and Bind: There are several tie-dye techniques you can use. For a spiral design, pinch the center of the shirt and twist it into a tight spiral. Secure with rubber bands. For a striped effect, accordion fold the shirt and bind it with rubber bands.
- Apply the Dye: Using a squeeze bottle, apply red and blue dye to different sections of the shirt. Be sure to wear gloves to protect your hands.
- Let it Set: Place the shirt in a plastic bag or container and let the dye set for at least 6-8 hours.
- Rinse and Wash: Rinse the shirt under cold water until the water runs clear. Remove the rubber bands and wash the shirt separately in cold water.
- Dry: Dry the shirt in the dryer or hang it to dry.
Looking for inspiration? There are tons of resources online like [4th of july tie dye shirts diy](https://shirtideas.us/4th of july tie dye shirts diy/) for fun patterns and ideas.
“Tie-dye is all about embracing imperfections! Don’t worry about making it perfect – just have fun with it!” says Michael Chen, a textile artist known for his vibrant tie-dye creations.
Fabric Markers and Paint Pens
If you’re looking for a more free-form approach, fabric markers and paint pens are an excellent choice. They allow you to draw directly onto the shirt, creating unique designs.
- Choose Your Markers: Opt for fabric markers or paint pens designed for use on textiles. These markers are permanent and won’t fade after washing.
- Sketch Your Design: Lightly sketch your design onto the shirt with a pencil. This will serve as a guide for your markers.
- Start Drawing: Use the fabric markers or paint pens to trace over your sketch. Get creative with your designs – add stars, stripes, fireworks, or patriotic quotes.
- Let it Dry: Allow the ink to dry completely before wearing or washing your shirt.
- Set the Ink: Iron the design on low heat to set the ink and make it more durable.
 Hand-Drawn Patriotic Shirt
Fabric markers are especially good if you want a similar aesthetic to life is good 4th of july shirts.
Iron-On Transfers
Iron-on transfers are a quick and easy way to add custom designs to your 4th of July shirts.
- Find or Create Your Design: You can find pre-made iron-on transfers online or create your own using printable transfer paper.
- Print Your Design: Print your design onto the transfer paper, following the manufacturer’s instructions. Remember to reverse the image if necessary.
- Prepare Your Shirt: Wash and iron your shirt.
- Position the Transfer: Place the transfer paper onto the shirt, with the design facing down.
- Iron the Transfer: Iron the transfer onto the shirt using a hot iron. Apply firm pressure and move the iron slowly over the entire design. Follow the manufacturer’s instructions for ironing time and temperature.
- Peel Off the Backing: Allow the transfer to cool slightly, then carefully peel off the backing paper.
Bleach Pen Designs
For a unique and edgy look, try using a bleach pen to create designs on a dark-colored shirt.
- Choose Your Shirt: Select a dark-colored cotton shirt, such as navy blue or black.
- Plan Your Design: Sketch your design onto the shirt with a light-colored pencil or chalk.
- Apply the Bleach: Carefully trace over your design with the bleach pen. Be precise, as bleach can spread.
- Let it Sit: Allow the bleach to sit for 10-15 minutes, or until the desired level of lightening is achieved.
- Neutralize the Bleach: Rinse the shirt thoroughly with cold water to neutralize the bleach.
- Wash and Dry: Wash the shirt separately in cold water and dry it in the dryer.
If you are looking for a more subtle, but still patriotic look, check out vineyard vines 4th of july shirt.
Creating easy DIY 4th of July shirts is a fantastic way to show your patriotic spirit and express your creativity. Whether you choose simple stencils, vibrant tie-dye, or intricate fabric marker designs, the possibilities are endless. So gather your supplies, unleash your inner artist, and create a one-of-a-kind shirt that you’ll be proud to wear this Independence Day!
FAQ: Easy DIY 4th of July Shirts
- What type of paint should I use for my DIY 4th of July shirt?
Use acrylic fabric paint for the best results. It’s designed to adhere to fabric and won’t easily wash off. - How can I make sure my stencil design comes out clean?
Use a stencil brush and dab the paint in thin layers to prevent bleeding under the stencil. Also, secure the stencil firmly with painter’s tape. - What’s the best way to set the dye in a tie-dye shirt?
After dyeing, let the shirt sit in a plastic bag for at least 6-8 hours before rinsing. This allows the dye to fully penetrate the fabric. - Can I use regular markers instead of fabric markers?
Regular markers may fade or wash out after a few washes. It’s best to use fabric markers specifically designed for textiles. - How do I prevent my iron-on transfer from peeling off?
Make sure to follow the manufacturer’s instructions for ironing time and temperature. Also, allow the transfer to cool completely before peeling off the backing paper. - Is it safe to use bleach on clothing?
Yes, but use it carefully and in a well-ventilated area. Always dilute bleach and test it on a small, inconspicuous area of the fabric first. - What if I mess up my DIY shirt design?
Don’t worry! Embrace the imperfections. Often, mistakes can lead to unique and creative outcomes. Otherwise, use it as a practice shirt to create something even better the next time!