The 100th day of school is a huge milestone! It’s a time to celebrate all the learning and growth that’s happened. And what better way to commemorate this special day than with a creative, personalized 100 days of school shirt? In this guide, we’ll explore fun and easy ways to make your own unique shirt.
Why Make a 100 Days of School Shirt?
Beyond just marking the occasion, creating a 100 days of school shirt is a fantastic way to get kids involved in a fun, hands-on project. It sparks creativity, encourages self-expression, and becomes a treasured keepsake. It’s also a great conversation starter, allowing kids to share their shirt’s story and celebrate their academic achievement with friends and teachers. Plus, it’s a welcome break from the usual store-bought options!
“Creating a 100 days of school shirt provides a tangible representation of the student’s journey,” says elementary school teacher, Sarah Miller. “It allows them to visually showcase their progress and celebrate their hard work in a unique and personalized way.”
Brainstorming Ideas for Your 100 Days of School Shirt
Before you dive into the crafting process, it’s helpful to brainstorm some ideas. Consider the following:
- The Number 100: How will you incorporate the number 100 into your design? Will it be the central focus, or a subtle detail?
- Themes: Does your child have a favorite subject, hobby, or character? Incorporate these elements into the design. Maybe a science theme with 100 atoms, or a sports theme with 100 balls.
- Materials: Think about what materials you’d like to use. Paint, markers, iron-on transfers, fabric scraps, and even glued-on objects are all possibilities.
- Simplicity vs. Complexity: Are you aiming for a simple, easy-to-execute design, or something more elaborate? Consider your crafting skills and the time you have available.
Here are a few popular themes:
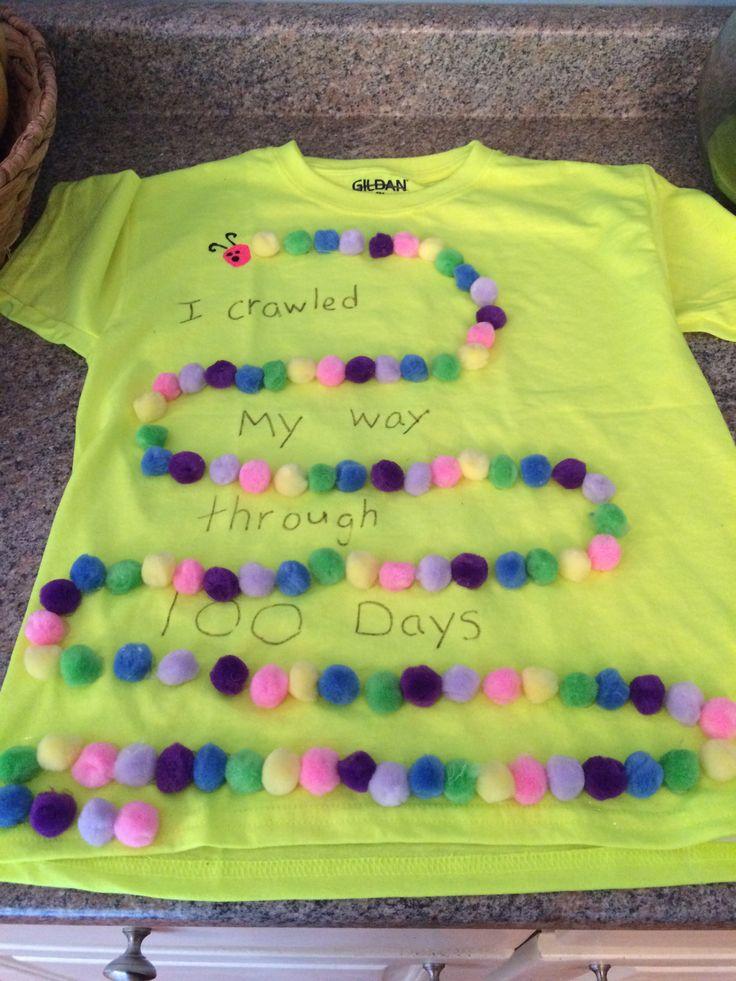
- Counting: Use 100 items to create a visual representation. Examples include 100 buttons, 100 stickers, or 100 painted dots.
- Words: Write 100 words related to school, learning, or your child’s favorite things.
- Decades: Dress up like you are 100 years old! Make the shirt look old and tattered.
- Future: Depict what your child wants to be when they are 100 years old.
How to make a 100 days of school shirt can be a collaborative experience.
Gathering Your Supplies
Once you have a design in mind, gather your supplies. Here’s a basic list to get you started:
- T-Shirt: Choose a plain t-shirt in your desired size and color. White or light-colored shirts work best for most designs.
- Fabric Markers or Paint: These are essential for creating your design. Opt for fabric-specific markers or paint that won’t fade or bleed when washed.
- Stencils (Optional): Stencils can be helpful for creating neat, precise designs, especially for numbers and letters.
- Iron-On Transfers (Optional): If you prefer a more professional look, consider using iron-on transfers. You can print your design onto transfer paper and then iron it onto the shirt.
- Embellishments (Optional): Buttons, beads, sequins, glitter, and fabric scraps can add extra flair to your shirt.
- Glue (If Using Embellishments): Choose a strong fabric glue that will securely adhere your embellishments to the shirt.
- Scissors: For cutting fabric scraps or stencils.
- Ruler or Measuring Tape: For precise placement of design elements.
- Cardboard or Newspaper: Place cardboard or newspaper inside the shirt to prevent paint or glue from bleeding through to the back.
 100 Days Shirt Supplies
Step-by-Step Guide: Making Your 100 Days of School Shirt
Here’s a step-by-step guide to help you create your masterpiece:
- Prepare the Shirt: Wash and dry the t-shirt before you start. This will remove any sizing or chemicals that could interfere with the paint or markers. Iron the shirt to create a smooth surface for your design.
- Protect Your Work Surface: Cover your work surface with newspaper or a drop cloth to prevent messes.
- Insert Cardboard: Place a piece of cardboard or newspaper inside the shirt to prevent paint or glue from bleeding through to the back.
- Sketch Your Design (Optional): If you’re using a more complex design, sketch it lightly onto the shirt with a pencil before you start painting or drawing.
- Start Creating!: Use your chosen materials to bring your design to life. Take your time and have fun!
- Let it Dry: Once you’re finished, let the shirt dry completely according to the instructions on your paint, markers, or glue. This may take several hours or even overnight.
- Heat-Set (If Necessary): If you’re using fabric paint, you may need to heat-set the design with an iron to make it permanent. Follow the instructions on the paint bottle.
- Wash and Wear: Once the shirt is completely dry and heat-set (if necessary), you can wash and wear it!
Don’t be afraid to get creative and experiment! There are no rules when it comes to making a 100 days of school shirt.
“The best 100 days of school shirts are the ones that reflect the child’s personality and interests,” shares art teacher, David Chen. “Encourage them to express themselves and have fun with the process.”
Design Ideas and Inspiration
Need some inspiration? Here are a few more ideas to get your creative juices flowing:
- 100 Gumballs: Draw or paint a gumball machine filled with 100 colorful gumballs.
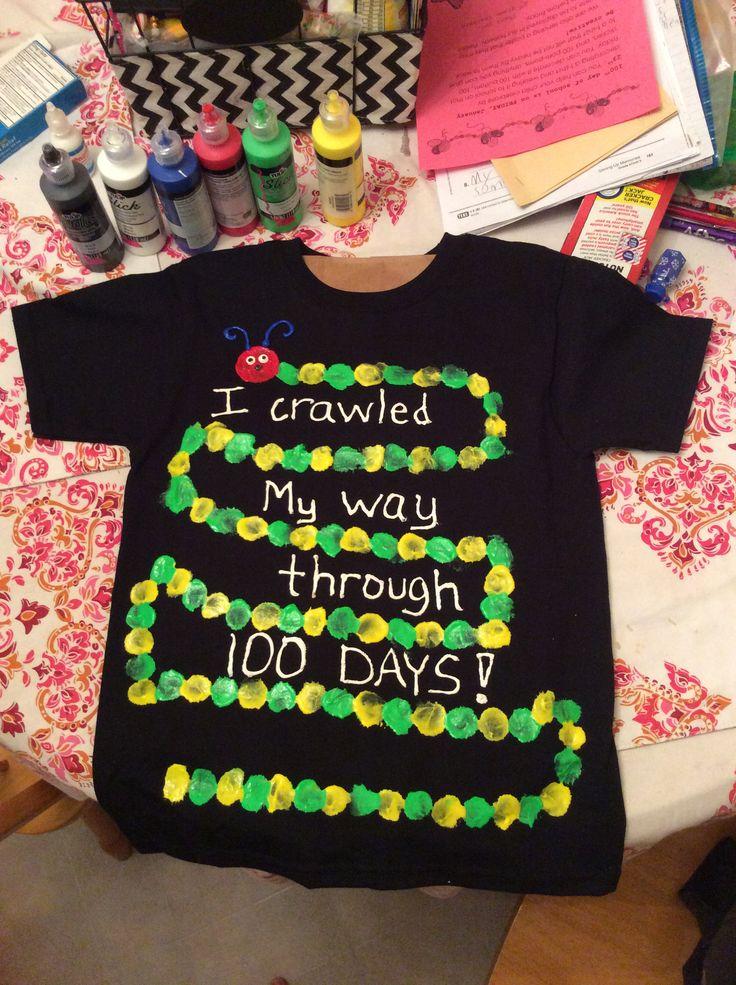
- 100 Fingerprints: Use your child’s fingerprints to create a unique and colorful pattern.
- 100 Stickers: Cover the shirt with 100 stickers related to your child’s interests.
- 100 Stars: Draw or paint 100 stars of different sizes and colors.
- 100 Math Problems: Write out 100 simple math problems and have your child solve them.
Remember, the possibilities are endless! Let your imagination run wild and create a shirt that your child will be proud to wear. You can also check out 100th day of school shirt ideas easy for more ideas. Looking for ideas specifically for girls? Check out 100th day of school shirt ideas girl.
Making it Educational
While the main goal is to have fun, you can also incorporate some educational elements into your 100 days of school shirt design.
- Math: Use the shirt to practice counting to 100, or to represent different mathematical concepts.
- Reading: Write 100 words related to reading, writing, or your child’s favorite books.
- Science: Depict 100 different animals, plants, or scientific concepts.
- History: Illustrate 100 historical figures or events.
This is a great way to reinforce what your child is learning in school while also creating a fun and memorable shirt. Teachers might even appreciate a back to school t-shirts for teachers!
Tips for Success
Here are a few tips to help you create a successful 100 days of school shirt:
- Plan Ahead: Don’t wait until the last minute to start your project. Give yourself plenty of time to brainstorm ideas, gather supplies, and create your design.
- Keep it Simple: If you’re short on time or crafting skills, opt for a simple design. There are plenty of easy and effective ideas to choose from.
- Involve Your Child: Let your child take the lead in the design process. After all, it’s their shirt!
- Protect Your Clothes: Wear old clothes or an apron to protect your clothes from paint or glue.
- Have Fun!: The most important thing is to have fun and create a shirt that your child will be proud to wear. And check out 100th day of school diy shirt ideas for more inspiration.
 Child Painting 100 Days Shirt
Caring for Your 100 Days of School Shirt
To keep your 100 days of school shirt looking its best, follow these care instructions:
- Wash Inside Out: Wash the shirt inside out to protect the design.
- Cold Water: Wash in cold water to prevent fading or bleeding.
- Gentle Cycle: Use a gentle cycle to avoid damaging the design.
- Mild Detergent: Use a mild detergent that is safe for colors.
- Tumble Dry Low or Hang to Dry: Tumble dry on low heat or hang the shirt to dry. Avoid high heat, which can damage the design.
- Iron Inside Out (If Necessary): If you need to iron the shirt, iron it inside out on a low setting.
With proper care, your 100 days of school shirt will last for years to come! It’s a fun and memorable way to celebrate your child’s academic achievement. Looking for more information about how to make a 100 days of school shirt? We’ve got you covered!
Creating a how to make a 100 days of school shirt guide can provide many creative ideas.
Conclusion
Making a 100 days of school shirt is a fun, creative, and educational activity that celebrates a significant milestone. By brainstorming ideas, gathering the right supplies, and following these simple steps, you can create a unique and personalized shirt that your child will treasure for years to come. So, get creative, have fun, and celebrate 100 days of learning in style!
FAQ: 100 Days of School Shirt
Q: What kind of shirt should I use?
A: A plain white or light-colored t-shirt works best, as it provides a good canvas for your design. Choose a comfortable fabric like cotton or a cotton blend.
Q: What kind of paint is best for fabric?
A: Fabric paint is specifically designed for use on fabric and is available in a variety of colors and finishes. Look for paints that are non-toxic and machine washable.
Q: Can I use markers instead of paint?
A: Yes, fabric markers are a great alternative to paint, especially for more detailed designs. Be sure to use markers that are permanent and won’t bleed or fade when washed.
Q: How do I prevent the paint from bleeding through to the back of the shirt?
A: Place a piece of cardboard or newspaper inside the shirt before you start painting or drawing. This will prevent the paint from bleeding through.
Q: How do I make the design permanent?
A: For fabric paint, heat-set the design with an iron according to the instructions on the paint bottle. For fabric markers, follow the manufacturer’s instructions for setting the ink.
Q: Can I use iron-on transfers?
A: Yes, iron-on transfers are a great option for creating a more professional-looking design. Simply print your design onto transfer paper and then iron it onto the shirt.
Q: How do I wash the shirt after I’ve created the design?
A: Wash the shirt inside out in cold water on a gentle cycle. Tumble dry on low heat or hang to dry. Avoid using bleach or harsh detergents.
Pingback: Cute 100 Day of School Shirt Ideas for Students and Teachers - Creative T-Shirt, Hoodie, and Sweatshirt Ideas for Every Occasion | ShirtIdeas.us